
Welcome to my Dragon Knight II strategy guide. With this brilliant document, you should have no trouble getting through the game. Let's start playing.
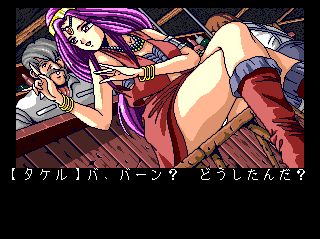
You are Takeru, and you're on your way to Phoenix. You'll meet up with the big lug Baan during the opening moments. When you arrive at Phoenix, you'll automatically speak with the town elder and then find yourself at the bar.

This is where you actually begin playing. Speak with the bartender and the bunny girl (use the first option). As a rule of thumb, keep talking to people until they stop saying new things. You can practice this technique here! The second option will eventually be for buying stuff; but you don't have any money yet, anyway. After you're done talking, use the third option to leave.
Now you're faced with the very intricate main menu. It's set up like this:

A allows you to visit various places in town. The destinations menu is laid out like this:
B lets you look through your inventory.
C shows your current stats and equipment.
D is for equipping weapons, armor, and shields. First, you select a character; the next three options will be weapon, armor, and shield; then you choose the item you'd like to equip.
E is Save.
F is Load. Note that this will not be available until you've saved and actually have a file to load.
Go around town and talk to everyone. Then head to the inn and select the second option.
Visit everyone again. Bad news... the girls have been taken away! This seems a little fishy, so head to the elder's place to find out what the heck is going on. He'll fill you in on the evil witch Mesaanya, who has kidnapped all the girls, and tell you about the Dragon Knight.

After he's done talking, visit him again. Then go to the graveyard and select the first option to enter the graveyard dungeon.
Press button II to bring up the dungeon menu. At this point, it looks like this:
 Inventory - Current stats/equipment
Equip items
Simple enough.
You're very weak to start, so hang around the entrance and fight the MUMMY girl to level up a bit. Return frequently to the inn, where you can stay and heal yourself. Your only options in combat right now are attack and run. If you're confronted by the GAS CLOUD girl, run! She's too tough at this point.
(FASCINATING NOTE: You can tell how strong an enemy is by the music that's playing when you fight it. There are four different battle tracks, one for each girl-fiend that you'll encounter on a given floor. The tune that plays here for the MUMMY will play for the weakest girls on the other floors too, while the GAS CLOUD girl gets the track saved for the toughest foes. The other two are somewhere in between.)
As you get stronger, start exploring a bit. I like to hang out relatively close to the entrance until I'm powerful enough to defeat all four of the girl-fiends on this floor with ease. Said girl-fiends are...
You are Takeru, and you're on your way to Phoenix. You'll meet up with the big lug Baan during the opening moments. When you arrive at Phoenix, you'll automatically speak with the town elder and then find yourself at the bar.

This is where you actually begin playing. Speak with the bartender and the bunny girl (use the first option). As a rule of thumb, keep talking to people until they stop saying new things. You can practice this technique here! The second option will eventually be for buying stuff; but you don't have any money yet, anyway. After you're done talking, use the third option to leave.
Now you're faced with the very intricate main menu. It's set up like this:

A - B - C
D - E - F
D - E - F
A allows you to visit various places in town. The destinations menu is laid out like this:
Tower - Graveyard - Elder
Bar - Inn - Weapons shop
Pharmacy - Magician - (blank)
Bar - Inn - Weapons shop
Pharmacy - Magician - (blank)
B lets you look through your inventory.
C shows your current stats and equipment.
D is for equipping weapons, armor, and shields. First, you select a character; the next three options will be weapon, armor, and shield; then you choose the item you'd like to equip.
E is Save.
F is Load. Note that this will not be available until you've saved and actually have a file to load.
Go around town and talk to everyone. Then head to the inn and select the second option.
Visit everyone again. Bad news... the girls have been taken away! This seems a little fishy, so head to the elder's place to find out what the heck is going on. He'll fill you in on the evil witch Mesaanya, who has kidnapped all the girls, and tell you about the Dragon Knight.

After he's done talking, visit him again. Then go to the graveyard and select the first option to enter the graveyard dungeon.
Press button II to bring up the dungeon menu. At this point, it looks like this:
 Inventory - Current stats/equipment
Equip items
Simple enough.
You're very weak to start, so hang around the entrance and fight the MUMMY girl to level up a bit. Return frequently to the inn, where you can stay and heal yourself. Your only options in combat right now are attack and run. If you're confronted by the GAS CLOUD girl, run! She's too tough at this point.
(FASCINATING NOTE: You can tell how strong an enemy is by the music that's playing when you fight it. There are four different battle tracks, one for each girl-fiend that you'll encounter on a given floor. The tune that plays here for the MUMMY will play for the weakest girls on the other floors too, while the GAS CLOUD girl gets the track saved for the toughest foes. The other two are somewhere in between.)
As you get stronger, start exploring a bit. I like to hang out relatively close to the entrance until I'm powerful enough to defeat all four of the girl-fiends on this floor with ease. Said girl-fiends are...

~ MUMMY ~

~ COYOTE ~

~ THIEF ~

~ GAS CLOUD ~
I won't be recommending when and where to level up; let common sense be your guide! Just make sure you're at the highest possible level (30) by the time you reach the last boss. ;)
Once you feel confident, head to (X13, Y13) to meet a red-headed bum.

You'll be ejected from the room. (Note: Just to be safe, I like to keep visiting the inhabitants of the dungeons until they stop saying new things, just like with the townsfolk. I recommend that you do the same!)
Go to (X08, Y11). You can walk through a fake wall to (X08, Y10), where you'll find some sort of statue.

At (X08, Y06), there's a... locked door.
At (X08, Y00), you'll find a buckler. Remember to equip it.
There's a dead end and a text message at (X10, Y01).
Head to (X10, Y00) to see a very important... rock.

Go back to town and speak to the elder. The bar, weapons shop, and pharmacy all have stuff for sale now. (Note: if the shopkeepers still won't sell you anything, talk to the elder again, and then head back to the shops.)
BAR
- Cheese 20, Wine 100, Bun 30
WEAPONS SHOP
- Long Sword 60, Broad Sword 300, Great Axe 1000, Stone Axe 2500, Excalibur 8200
- Leather Armor 40, Scale Armor 250, Ring Armor 950, Chain Mail 2200, Full Plate 7900
- Large Shield 45, Round Shield 260, Tower Shield 980, Great Shield 2400, Miracle Shield 8100
Buy new equipment at your own discretion. Takeru should have all the best stuff by the final confrontation, obviously.
PHARMACY
- You can buy medicine for prices of 5, 30, and 100. The three different types can be used to restore 20 HP, 40 HP, and 100 HP (respectively) to one character.
When you're done shopping, talk to everyone again (make a habit of doing this) before heading back to the graveyard dungeon.
If you bought items from the pharmacy, the option to use them will be added to the dungeon and battle menus.
When you're back in the dungeon, visit the red-headed bum again. Then head to the stone at (X10, Y00), where a little jingle will play. Go back to the bum. Another jingle will play, and you'll have a key in your possession. Now you can get into the locked door at (X08, Y06), so head there.
You'll find coffins at (X03, Y03), (X05, Y03), (X07, Y03), (X09, Y03),(X11, Y03), and (X13, Y03). You'll find the key to the tower inside the one at (X13, Y03).

The tower will be our next destination, but before leaving, you should make sure that your entire map for the graveyard dungeon has been filled in.
Enter the tower. On the first floor, you'll have four new girl-fiends to contend with:
 ~ KOBOLD ~
  ~ BUBBLY BUBBLE ~
  ~ ORC ~
  ~ ????? ~
 I'm not sure what the katakana is getting at with that last one, to be honest, but she's by far the toughest of the four. You might want to hang around by the entrance for a bit and "test the waters," seeing how well you fare against these new foes and leveling up or buying new equipment as necessary.
There's a locked door at (X01, Y15). This will eventually lead to a lift, so don't forget about it!
Go to (X02, Y14) for text.
You'll find some sort of device at (X04, Y10)...

...but you can't do anything with it right now.
There's more text at (X10, Y12). Head to (X17, Y16) to find another locked door.
At (X15, Y12), you'll find someone on the floor holding a note.

You'll automatically return to the elder's place. You'll hear a glorious jingle, and with good reason: you now have the sacred scripture you need to remove Mesaanya's curse from the THIEF girl.
Head back to the graveyard dungeon and bumble around until you encounter the THIEF. Once you find her, you'll notice a new option in the battle menu. Use it, and the girl will be freed from Mesaanya's curse. Now head back to the inn and stay there (get in the habit of doing this after you save girls). The girl you just rescued will pay you a visit.
Head back to the tower. There's another locked door at (X17, Y01).
At (X15, Y02), you'll find a lift.

You can't use it now, but that's okay, because you've also just found the COYOTE sacred scripture. Go back to the graveyard dungeon, rescue the COYOTE girl-fiend, and stay at the inn to see her again.
If you haven't bought them already, now is a good time to purchase the cheese, wine, and bun from the bar.
Back to the tower. You can walk through a fake wall to get from (X09, Y02) to (X10, Y02).
You'll meet a rat at (X11, Y3).

He'll take your cheese, and you'll get the MUMMY sacred scripture. Immediately talk to him again, and he'll take your wine and go away.
Scout around a little more before leaving. At (X02, Y01), you'll find a battle axe. At (X00, Y01), there's another locked door. Fill out your 1F map (aside from the areas behind locked doors) and then leave.
Go back to the graveyard dungeon, save the MUMMY girl, and stay at the inn to see her again. Go to the pharmacy, where you'll see her yet again. Speak to both her and the pharmacist.
Visit the device at (X04, Y10), and select NEWS. Head to (X15, Y02). You'll now be able to use this lift to go to the second and third floors. You can't use it to reach the fourth, regardless of the 4F option that's initially available.
Go to the second floor. At (X14, Y04), you'll find a BIG HEAVY DOOR that you can't get past.

Head back to town.
Go to the bar and talk to the bartender until he has nothing new to say. Go to the elder and talk to him. Go back to the bar and Baan should be there. If he isn't, keep talking to the bartender until you're sure he's said all he's needed to say, and then go back to see the elder again. The elder will mention Baan, and then you will be able to go to the bar and meet up with him.

Talk to Baan, and he will join you on your quest!
Now you'll be able to get past the BIG HEAVY DOOR. The girl-fiends on 2F are...

~ WEREWOLF ~

~ GIANT SPIDER ~

~ ANACONDA ~

~ BUNNY ~
BUNNY is the tough one.
You can walk through fake walls to get from (X09, Y04) or (X09, Y02) to (X09, Y03), where there's a message.
Takeru and Baan will have a conversation at (X09, Y08), where there's a locked door.
You can walk through a fake wall to get from (X09, Y12) to (X09, Y13), where you'll find the KOBOLD sacred scripture. Go back to the first floor of the tower and find the KOBOLD girl. Save her and she'll give you the sacred scripture for the GAS CLOUD girl. Leave the tower and you'll automatically see the girl you just freed. Go to the inn, and she'll be there. Speak with her and the innkeeper.
Go back to the graveyard dungeon and save the GAS CLOUD girl. Stay at the inn and see her there. After that, go to the weapons shop, and she'll be there too. Speak with her and the shopkeeper guy.
Go back to the second floor of the tower. There are plenty of fake walls here. You can go from (X00, Y12) to (X01, Y12), from (X05, Y14) to (X05, Y13), and from (X04, Y13) to (X03, Y13).
An event takes place at (X03, Y15). You'll see a heartwarming scene involving a floating key and a little moth getting split in two.

For more fake-wall fun, walk from (X04, Y17) to (X04, Y16).
Go back to town and speak to the elder and the magician; then, head back to the second floor of the tower.
Go to (X08, Y17) to find a supply room. Then head to (X17, Y16) to find a store. Proceed to (X17, Y17) and speak with the weird guy. Go back to the supply room and get an item.

Bring it to the weird store guy, and he'll give you a new item plus the sacred scripture for the ORC girl. Go back to the first floor and save her. Stay at the inn and see her there, and then return to the second floor of the tower.
Go back to (X03, Y15). Now you can take the key. Use it to unlock the door at (X09, Y08).
An event will take place at (X04, Y08). You'll fall into a pit and end up back on the first floor. Go back to the second floor and visit the weird store guy, who'll give you a new item.

Now you can get past the pit.
You can walk through fake walls from (X05, Y06) to (X04, Y06) and from (X01, Y06) to (X02, Y06), where you'll find a chest containing the splint mail.
You'll find the sacred scripture for BUBBLY BUBBLE at (X03, Y02). Mesaanya will appear there and... she has Kate!

After the scene, you'll obtain a medal.
At this point, you should have just about all of your 2F map filled in. There are a couple of very small areas that you can't get to because they're completely surrounded by walls. Don't worry about them.
Go back to the first floor and save the BUBBLY BUBBLE girl. Stay at the inn to see her again. (This is the best part of the game.)
Go back to the tower and take the lift to the third floor. The batch of girl-fiends consists of...

~ FAIRY ~

~ HARPY ~

~ ANGEL ~

~ BANSHEE ~
The BANSHEE can really wallop you.
At (X03, Y07), you'll find a strange door. Since you already have the medal, Takeru will insert it into the hole in the door, and you'll be able to proceed.

At (X13, Y17), you'll find some sort of really strange machine. Head to (X17, Y17), where you'll encounter the rat again.

He'll take your bun this time. Go back to the strange machine and you'll receive a new item.
Go back to town and talk to the magician, who'll have plenty to say. You'll automatically leave his place when he's done. Go back to the third floor of the tower. You can now advance past the strange machine.

Go to (X13, Y16) to get the all-important "TOUCH ME" message.
(X11, Y13) is its own little room. When you go there, Takeru and Baan will converse and then automatically leave the room.
At (X12, Y10), walk through a fake wall to get to (X13, Y10), which is a supply room. Takeru will take the rope from the supply room.

Go back to (X11, Y13). You'll drop down to the second floor by using the rope. At (X11, Y14), there's a chest. You'll get the kite shield and the ANACONDA sacred scripture.
Note: At this point, the only spot of gray that should be left on your 2F auto-map is at (X04, Y15). I don't believe that you can ever actually access this point, so don't worry about it.
Go back to the third floor by using the rope, and then use the lift to head back down to the second floor to save the ANACONDA girl. You know the drill: head back to town, stay at the inn, and see the girl you just freed.
Head back to the third floor. At (X09, Y00), you'll find the sacred scripture for the WEREWOLF. Go back to the second floor and free the WEREWOLF girl. Stay at the inn to see her, and then go to the graveyard to speak with her again.
Go to (X08, Y02) of the third floor. Mesaanya will appear again!

You'll see Kate as well. And you'll get the sacred scripture for the GIANT SPIDER. So it's back to the second floor to rescue the spider girl. Stay at the inn to see her, as usual.
Go back to the third floor. (Note: If you're getting tired of all this back and forth stuff, feel free to find multiple scriptures before freeing their respective girls or staying at the inn. I'm laying out each task in as straightforward a manner as possible, but you can save multiple girls in between inn visits. Just make sure you see them all once you do head back to town).
You'll find a locked door at (X02, Y04).
At (X04, Y14), you'll find another one of those strange machines. You can't pass this one yet, although you do receive a new item.
Now you must head back to town. Visit the magician. Uh, something weird has happened to his face.

Next, visit the elder. Then visit the elder yet again. (I also spoke with the bartender and the girl at the graveyard and stayed at the inn in between visits, but all of that was probably unnecessary.) Finally, go to the bar and you will meet Sophia, who will join your party.
(If she isn't there, just pay additional visits to the aforementioned characters and then check back.) Visit the elder and the magician again, and then head back to the third floor of the tower.
Sophia can use spells. You'll notice the option to use these spells has been added to the dungeon menu. Three of them are for healing your party (the first restores 50 HP to all; the second, 100; and the third, 200+ [possibly max]); but the bottom-right one is Return, which allows you to warp back to town. No more trudging all the way back!
She can use additional spells in battle. Use the new option in the battle menu to bring up her list. It'll look like this:
A - B
C - D
E - F
A, B, and C are the healing spells from the dungeon menu. D, E, and F are all attack spells. D is fire; F, freeze; and E... something else. Frankly, I never needed any of these, but they're there if you want 'em.
Anyway, now you can get past that strange machine at (X04, Y14) of the third floor. At (X05, Y14), you'll get another one of those thrilling "TOUCH ME" messages.
You'll obtain a key at (X08, Y16). Now you can unlock the door at (X02, Y04). At (X01, Y02), you'll find a stairway leading to the fourth floor (which is quite significant, as the lift you've been using can't make it up there, even though 4F is initially listed as an option).
And with that, your map for 3F should be complete.
Meet the girl-fiends of 4F:

~ UNICORN ~

~ ????? ~

~ PIERROT ~

~ BENGAL TIGER ~
Sorry, but I have no idea what the thing in the winter outfit is supposed to be, and I can't make out what the katakana is stating.
Speak to the little old guy at (X01, Y06).

He won't let you pass.
At (X04, Y02), you'll find a shower...

...and the sacred scripture for HARPY. The HARPY girl can be found on 3F. Save her, and then return to town. You'll automatically see her again. Visit her again at the magician's place. You'll automatically leave when the conversation is over.
Back to 4F. At (X05, Y09), you'll meet the WELL COME TO MY KEYS guy.

At (X08, Y10), you'll find an odd cage-like structure. You'll be forced to move back.
(X13, Y06) is the ice room. You'll have to leave it.
(X13, Y10) is the heat room. You'll have to leave it as well. (Note that there are orbs in both rooms.)
You can walk through fake walls from (X11, Y16) to (X12, Y16), and again to (X13, Y16).
At (X17, Y16), walk through a fake wall to (X16, Y16). You'll find a treasure chest containing a great sword.
At (X14, Y15), walk through a fake wall to (X14, Y16). You'll fall through a pit and end up on 3F. You're close to where the rat is (X17, Y17), so go talk to him. You'll get the sacred scripture for ?????. (It's the girl on the first floor of the tower that I couldn't identify. She should be the only one left down there, so you won't have any trouble finding her.) The rat will be gone now. Go save the girl. Leave the tower. Meet the girl you just saved right outside the tower. Stay at the inn, and she'll be there, too!
Back to 4F. At (X01, Y16), you'll find a chest containing plate armor.
At (X07, Y13), you'll find a library and read a book. At (X04, Y16), you'll find another library and read another book.

At (X07, Y16), you'll find the ANGEL sacred scripture. The ANGEL girl is back on floor three. Go there, save her, and stay at the inn.
Now, DON'T go back to the tower yet. Go to the graveyard dungeon instead. Visit the red-headed bum and you'll get a new item. Re-enter his room and he'll be gone.
Now go back to the fourth floor of the tower. Go to the shower and then go to the heat room. You'll obtain the orb.

Go to the WELL COME TO MY KEYS guy and you'll acquire a new key. (Note: You may have to revisit the cage-like structure and/or re-enter his room in order for him to give it to you.)
Go to the cage-like structure. You'll find the BUNNY sacred scripture, as well as a new item.

Head back down to the second floor to save the BUNNY girl. Stay at the inn, and then head to the bar to visit her. Speak to her, the bartender, Baan, and Sophia.
Back to 4F. Go to the cold room and pick up a new item.

Visit the little old man. He'll finally let you pass.
At (X01, Y00), you'll find the BANSHEE sacred scripture. Go back to 3F and save the BANSHEE girl, and then stay at the inn.
Back to 4F. At (X01, Y13), you'll find the stairs that lead to the fifth floor. Your 4F map should be complete by now, save for the (X07, Y10) point, which, as far as I know, you cannot access.
Things start to get tough on 5F. The girl-fiends are...

~ LIZARD BABY ~

~ BERSERKER ~

~ ELF MAGE ~

~ EVIL PRIEST ~
The EVIL PRIEST is pretty strong!
There are some strange doors that you cannot pass yet. These doors can be found at points (X05, Y11), (X05, Y09), (X09, Y07), (X08, Y12), (X05, Y06), (X09, Y05), (X12, Y11), (X12, Y08), and (X12, Y06). Also, you can't enter the "regular" door at (X08, Y10) yet.
At (X16, Y04), you'll find a strange room and your party members will have a conversation, mentioning a card they need to get.

At (X08, Y00), you'll find the sacred scripture for the BENGAL TIGER. At (X07, Y00), you'll fall down a pit and end up on the fourth floor, which is just as well since that's where the TIGER girl is. Find her, save her, and return to town, where she'll automatically meet up with you.
Back to 5F. Make sure you've examined all of the strange doors. Head to (X08, Y15). A brief exchange will take place amongst your characters. Go to (X08, Y17). You'll meet up with the rat once again, and he'll give you the card that your party needs.

This won't sit well with a certain someone...

Now, if you use the inventory option in the dungeon menu, you'll be given a new option that allows you to view the card you just acquired whenever you want. This card is going to be your way into all those strange doors.
Note the colors on the card, starting at "12 o'clock" and working around, clockwise: blue, red, purple (pink), green, light blue, yellow, white, black.
Now, those strange doors are going to ask you questions when you approach them. You'll need to select a color for your answer. The questions they ask and the answers you must give will change every single time you approach a door (yes, even the same door will ask a different question with a different answer). What makes this even tougher is that most of the answer choices are written out in Kanji. Here are how the answers will be presented when the doors ask you a question:
BLACK - YELLOW
RED - PINK
GREEN - LIGHT BLUE
BLUE - WHITE
RED - PINK
GREEN - LIGHT BLUE
BLUE - WHITE
Approach the (X08, Y12) door. This is the light blue door, so it will ask you about a color relative to light blue on the card. For example, the question I received presented the number "5" to me.

So I counted clockwise five spaces from light blue on the card, which gave me red. I selected the "red" answer and the door opened.
Note: For some doors/questions, you may have to move counter-clockwise. This is a nuisance, yes, but clockwise usually works and should be your first attempt. The nuisance doors for me were (X05, Y11), and (X12, Y11). Clockwise worked for all the others.
Once you get in, you'll find the UNICORN sacred scripture at (X08, Y14). The UNICORN girl can be found on 4F, but before you go running off to save her, take a couple more steps to (X09, Y13), where you'll find a yellow ball in a hole.

We'll talk about those balls in a moment, but first, go ahead and save the UNICORN girl. Stay at the inn, as usual.
Back to 5F. We need to work on those strange doors now. Behind each door, you'll find a ball to take. Before you leave, you'll usually leave another ball behind. But before we worry about the balls, let's just get all the doors open.
The white door is at (X05, Y09). It gave me a "5," so I went clockwise on the card and chose green and the door opened.
The black door is at (X05, Y06). It gave me a "4," so I went clockwise and chose green once again, and the door opened.
The blue door can be found at (X09, Y05). It gave me a "3," so I went clockwise and chose green. The door opened.
The red door is at (X12, Y06). It gave me a "3." Clockwise in this case means light blue. The door opened.
The purple door is at (X12, Y08). "2" clockwise is light blue once again. The door opened.
The pesky green door is at (X12, Y11). It hit me with a "2." Two spots COUNTER-clockwise from green means red. The door opened.
Go to the (X05, Y11) door, another problem door. This is the yellow door. I was presented with a "2," so I moved counter-clockwise from yellow two spots on the card and landed on green. I chose green and the door opened.
Now that we can get past all of the doors, we need to pick up and place those weird little balls. Going in the correct order makes life easier, so just follow along.
Go inside the door you just opened at (X05, Y11). At (X04, Y13), you'll get the blue ball.
Go to (X03, Y09). You'll find the sacred scripture for the weird thing in the winter outfit on 4F. Don't save her yet, though; let's get this ball puzzle over with first. Proceed to (X04, Y08). You'll place the blue ball and pick up the green ball.
Go to (X13, Y05). You'll put down the green ball and get the white one.
At (X14, Y08), you'll find the sacred scripture for the PIERROT, who is on 4F. Don't save her yet. Proceed to (X13, Y09). Put down the white ball and obtain the red one.
At (X09, Y03), you'll find the sacred scripture for the FAIRY, a third-floor girl-fiend. Just hold on to it for now. Proceed to (X08, Y04). Put down the red ball and pick up the purple one.
(X13, Y12) is next. Place the purple, pick up the light blue.
Head for (X04, Y05). Drop the light blue, get the black.
Go to (X09, Y13). You'll put down the black and obtain another yellow.
You can now enter the door at (X09, Y07). Place both yellows at (X08, Y08).
You can now enter the door at (X08, Y10). The stairs leading to the sixth floor are at (X09, Y09). Go up there for a second and just walk around that first room (for the sake of a trigger), but then head back down to the fourth floor to save PIERROT and the winter-themed abomination and the third floor to save FAIRY. Note that your 5F map should be complete now. Stay at the inn three times to meet with all three girls you just saved. Then head to the weapons shop to see one of them again. Speak with everyone there.
You can now (finally) enter the first-floor door at (X01, Y15).

You can use the lift at (X01, Y16) to get to the fourth, fifth, and sixth floors. Take this lift up to 6F.
The girl-fiends on the sixth floor are...

~ RED LIZARD ~

~ CENTAUR ~

~ NINJA ~

~ EVIL WITCH ~
The EVIL WITCH is the enemy's champion.
At (X00, Y00), you'll find the BERSERKER sacred scripture. She's on the fifth floor, but you don't need to save her just yet. Explore more first, provided that you're strong enough.
You'll see Kate at (X15, Y04).

At (X09, Y03), you'll find the sacred scripture for the ELF MAGE. She's also on the fifth floor, but you don't need to save her yet.
At (X15, Y07), you'll find the LIZARD BABY sacred scripture. 5F is where you can find her, and now might not be a bad time to head down there and save her, along with the BERSERKER and ELF MAGE girls.
Return to town and stay at the inn three times to meet with all three girls. Then head to the magician's house to see one of them yet again. Then head back to 6F.
You'll see Kate again at (X16, Y17).

As you're completing your map, make your last stop (X03, Y09). You'll find a throne...

...as well as the sacred scripture for the EVIL PRIEST, who can be found back on 5F. When you're leaving the "throne room," you'll see Kate again at (X03, Y12).

Take a step over to (X02, Y12), and you'll find a very important key.

Head back down to 5F and save the EVIL PRIEST. Stay at the inn.
NOTE: Before saving the last few girls, make sure that Takeru is at level 30 and is equipped with Excalibur, the full plate armor, and the miracle shield. This will make the last battle an easy one.
Now you can finally enter those locked doors on 1F. You'll find the RED LIZARD sacred scripture at (X00, Y00), the CENTAUR one at (X17, Y00), and the NINJA one at (X17, Y17). Head back up to 6F to save those girls.
When you save the RED LIZARD girl, you'll get the EVIL WITCH sacred scripture, so save her as well.
Return to town after you've saved all four. One of them will automatically meet with you. Stay at the inn to meet with another. The third will automatically meet with you, and you can stay at the inn to see the fourth.
Head to the pharmacy to see one of the girls again there. Speak with everyone there.
All of the girls have been saved... except for Kate.
Visit the elder.
Go to the graveyard dungeon. Go to the statue at (X08, Y10). You'll receive and look at a map.

Head back to town and go to the bar. Talk to the bartender. After the talking, there will be a new option available. Select it.
You're now inside the final dungeon.
Just keep following the path.
Prepare for a SHOCKING PLOT TWIST.
Then there's the final battle.

If you followed my advice about levels and equipment, you just have to keep attacking and you'll win.
You'll find yourself back in town. Visit the elder.
Stay at the inn and a special someone will visit you.
FINAL CHALLENGE: Visit every place in town until the people have nothing more to say to you. There's probably some sort of logical sequence to this, but I'm way too worn out at this point to figure it out. I just visited every place in order, and then I did it again. The magician's place was my last stop.
Then you'll finally get to watch the ending.

~ THE END ~
No comments:
Post a Comment